


Last week we released create-llama, a command-line tool to generate a full-stack LlamaIndex application for Retrieval-Augmented Generation (RAG). The response was fantastic, so we’ll be following up with more templates and more features. We also wanted to show you just how easy it is to get your generated app all the way to production. So here’s a step by step guide, for each of the three backends we currently support: Next.js serverless, Express, and Python.
Next.js backend
The serverless full-stack Next.js application is the simplest version to deploy as you only have one artifact to deploy. Because it’s a Next.js app we’ll be deploying to Vercel, the home of Next.js.
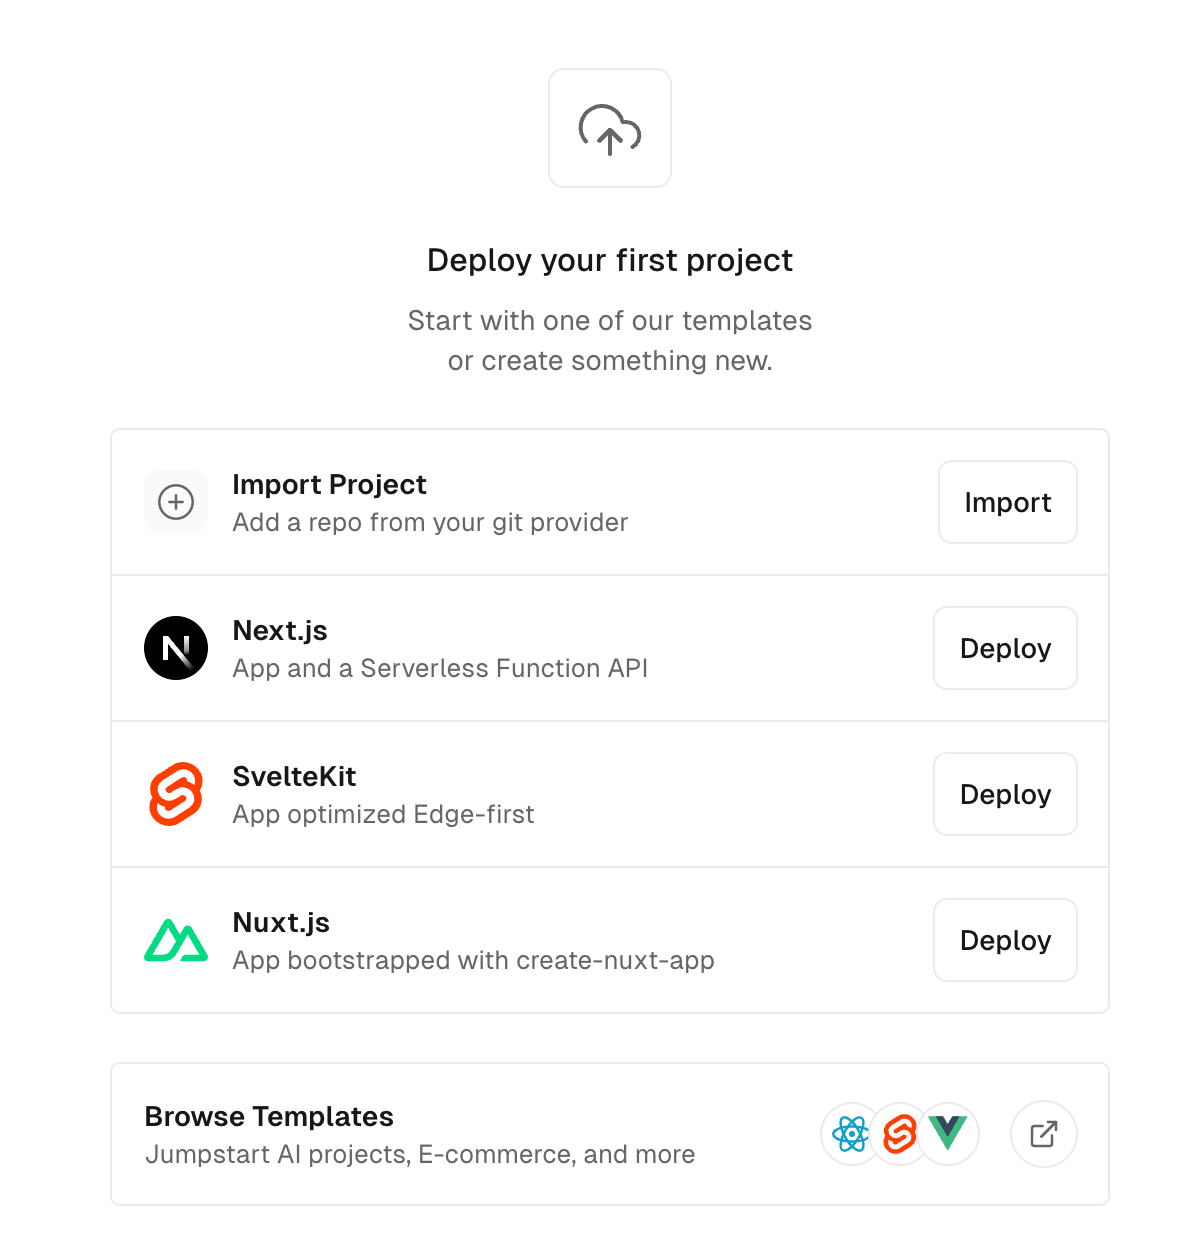
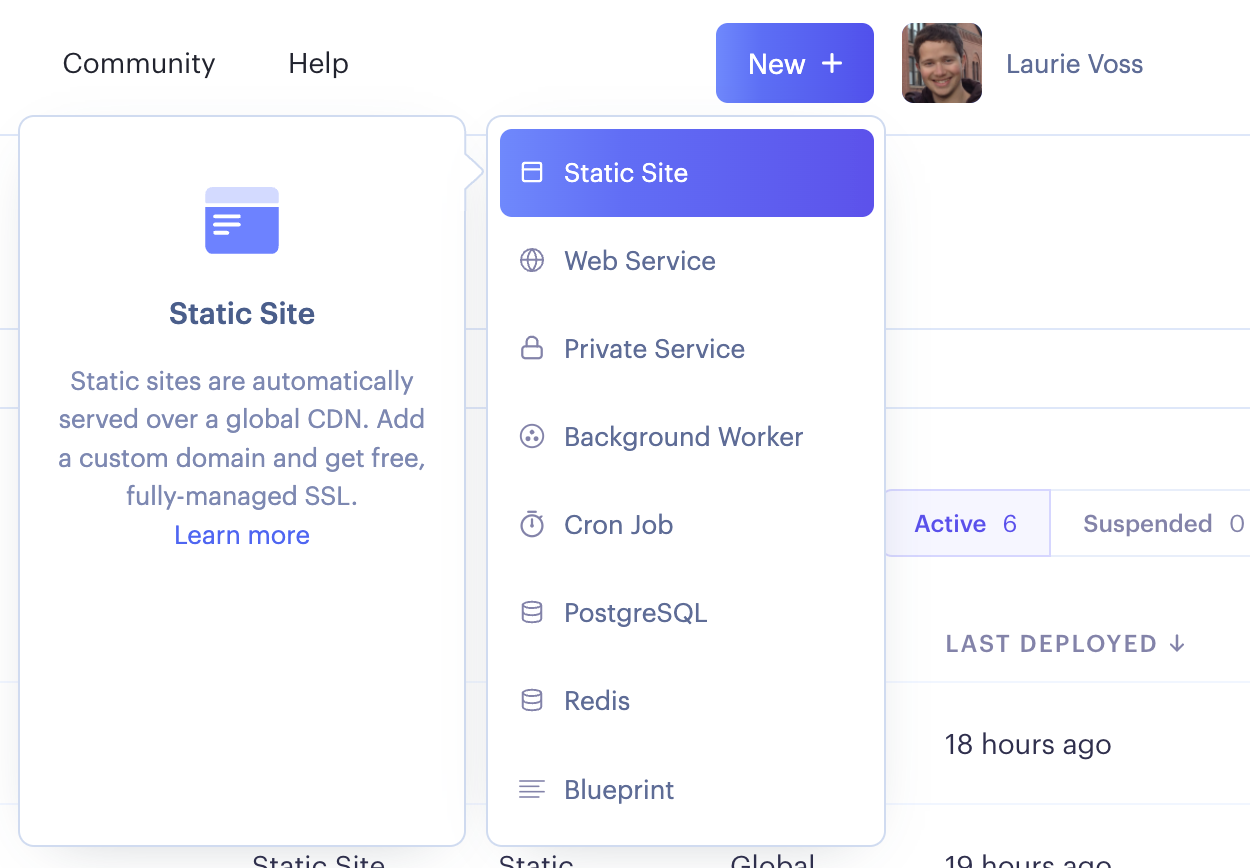
Step 1: run create-llama
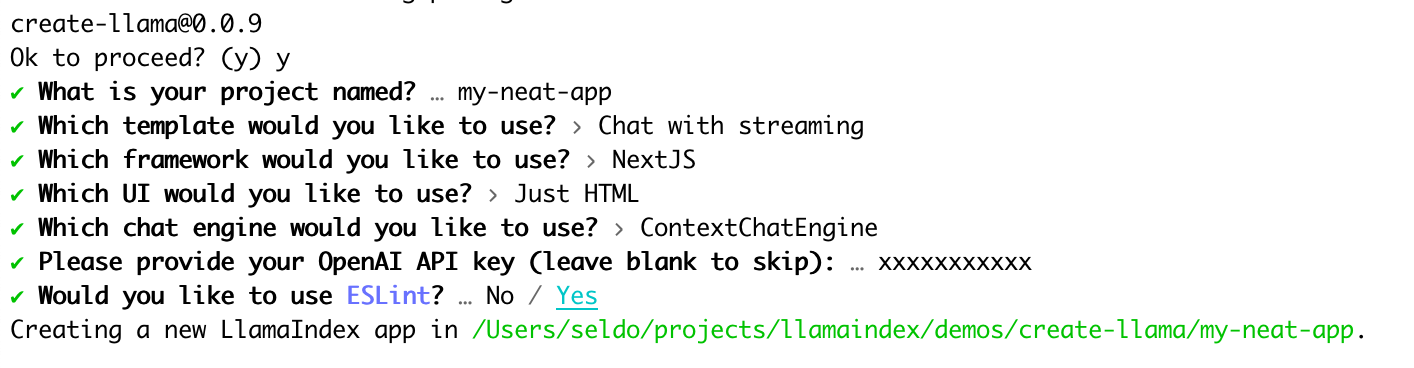
First run create-llama to generate your app. We strongly recommend generating a new OpenAI API key and supplying it at generation time (create-llama apps can be customized to use other LLMs but that’s out of scope for this tutorial).
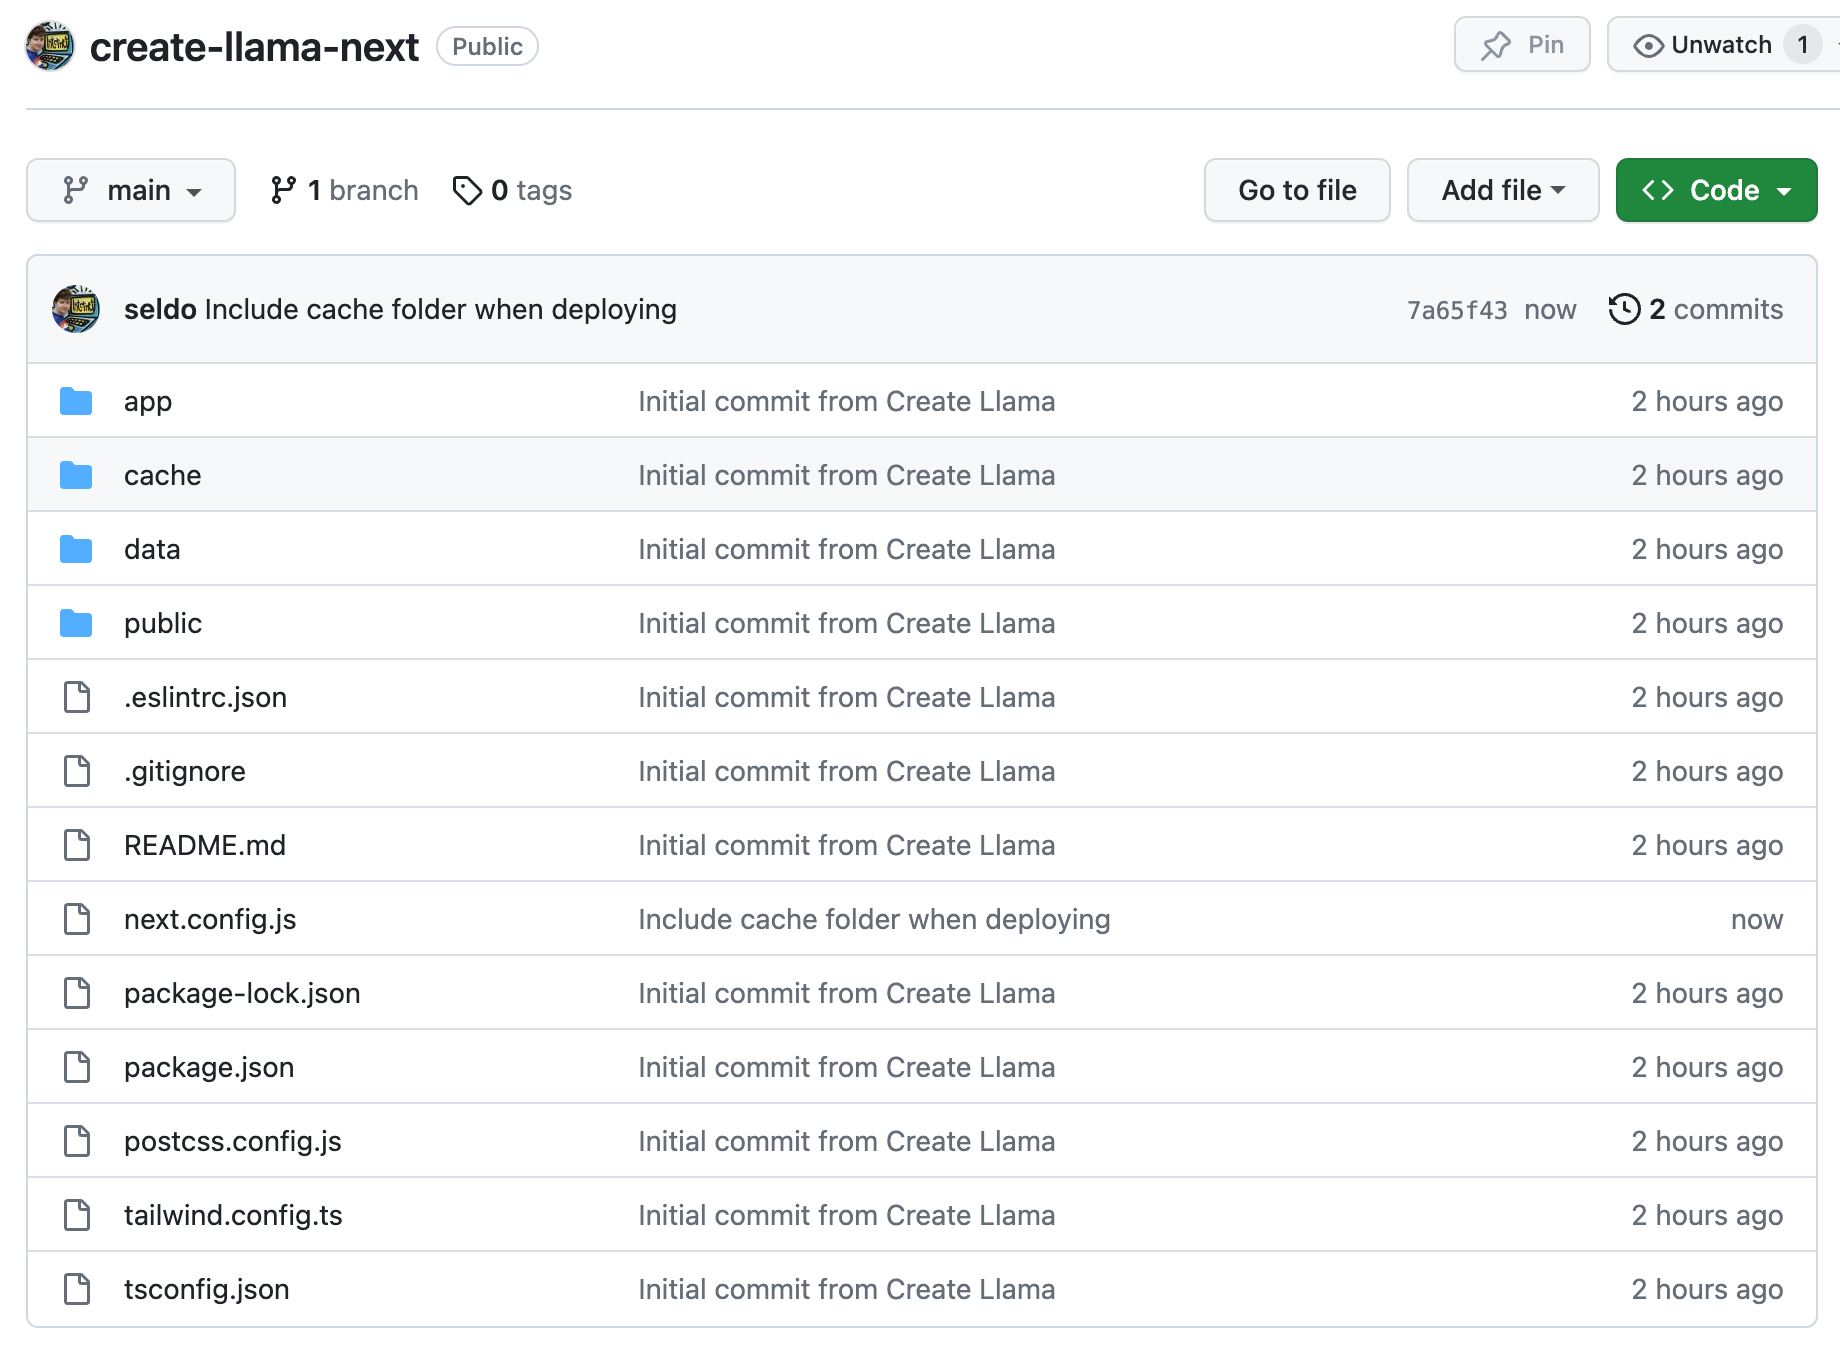
Step 2: create a GitHub repository and push your app to it
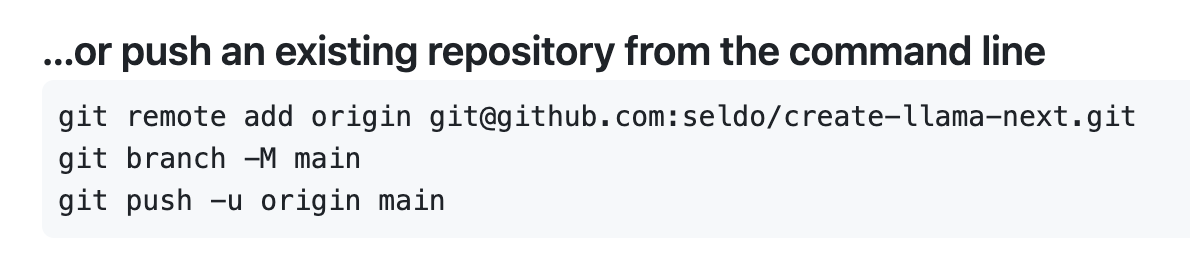
The easiest way to deploy on Vercel is from a linked GitHub repository. Your generated app is already set up as a git repo, so all you have to do after creating a new empty repo is follow the instructions to push it up. This should give you a repo that looks a bit like this:
Step 3: import your repo into Vercel
Select the option to create a new project from a git repo:
and select the repo you just created after authorizing:

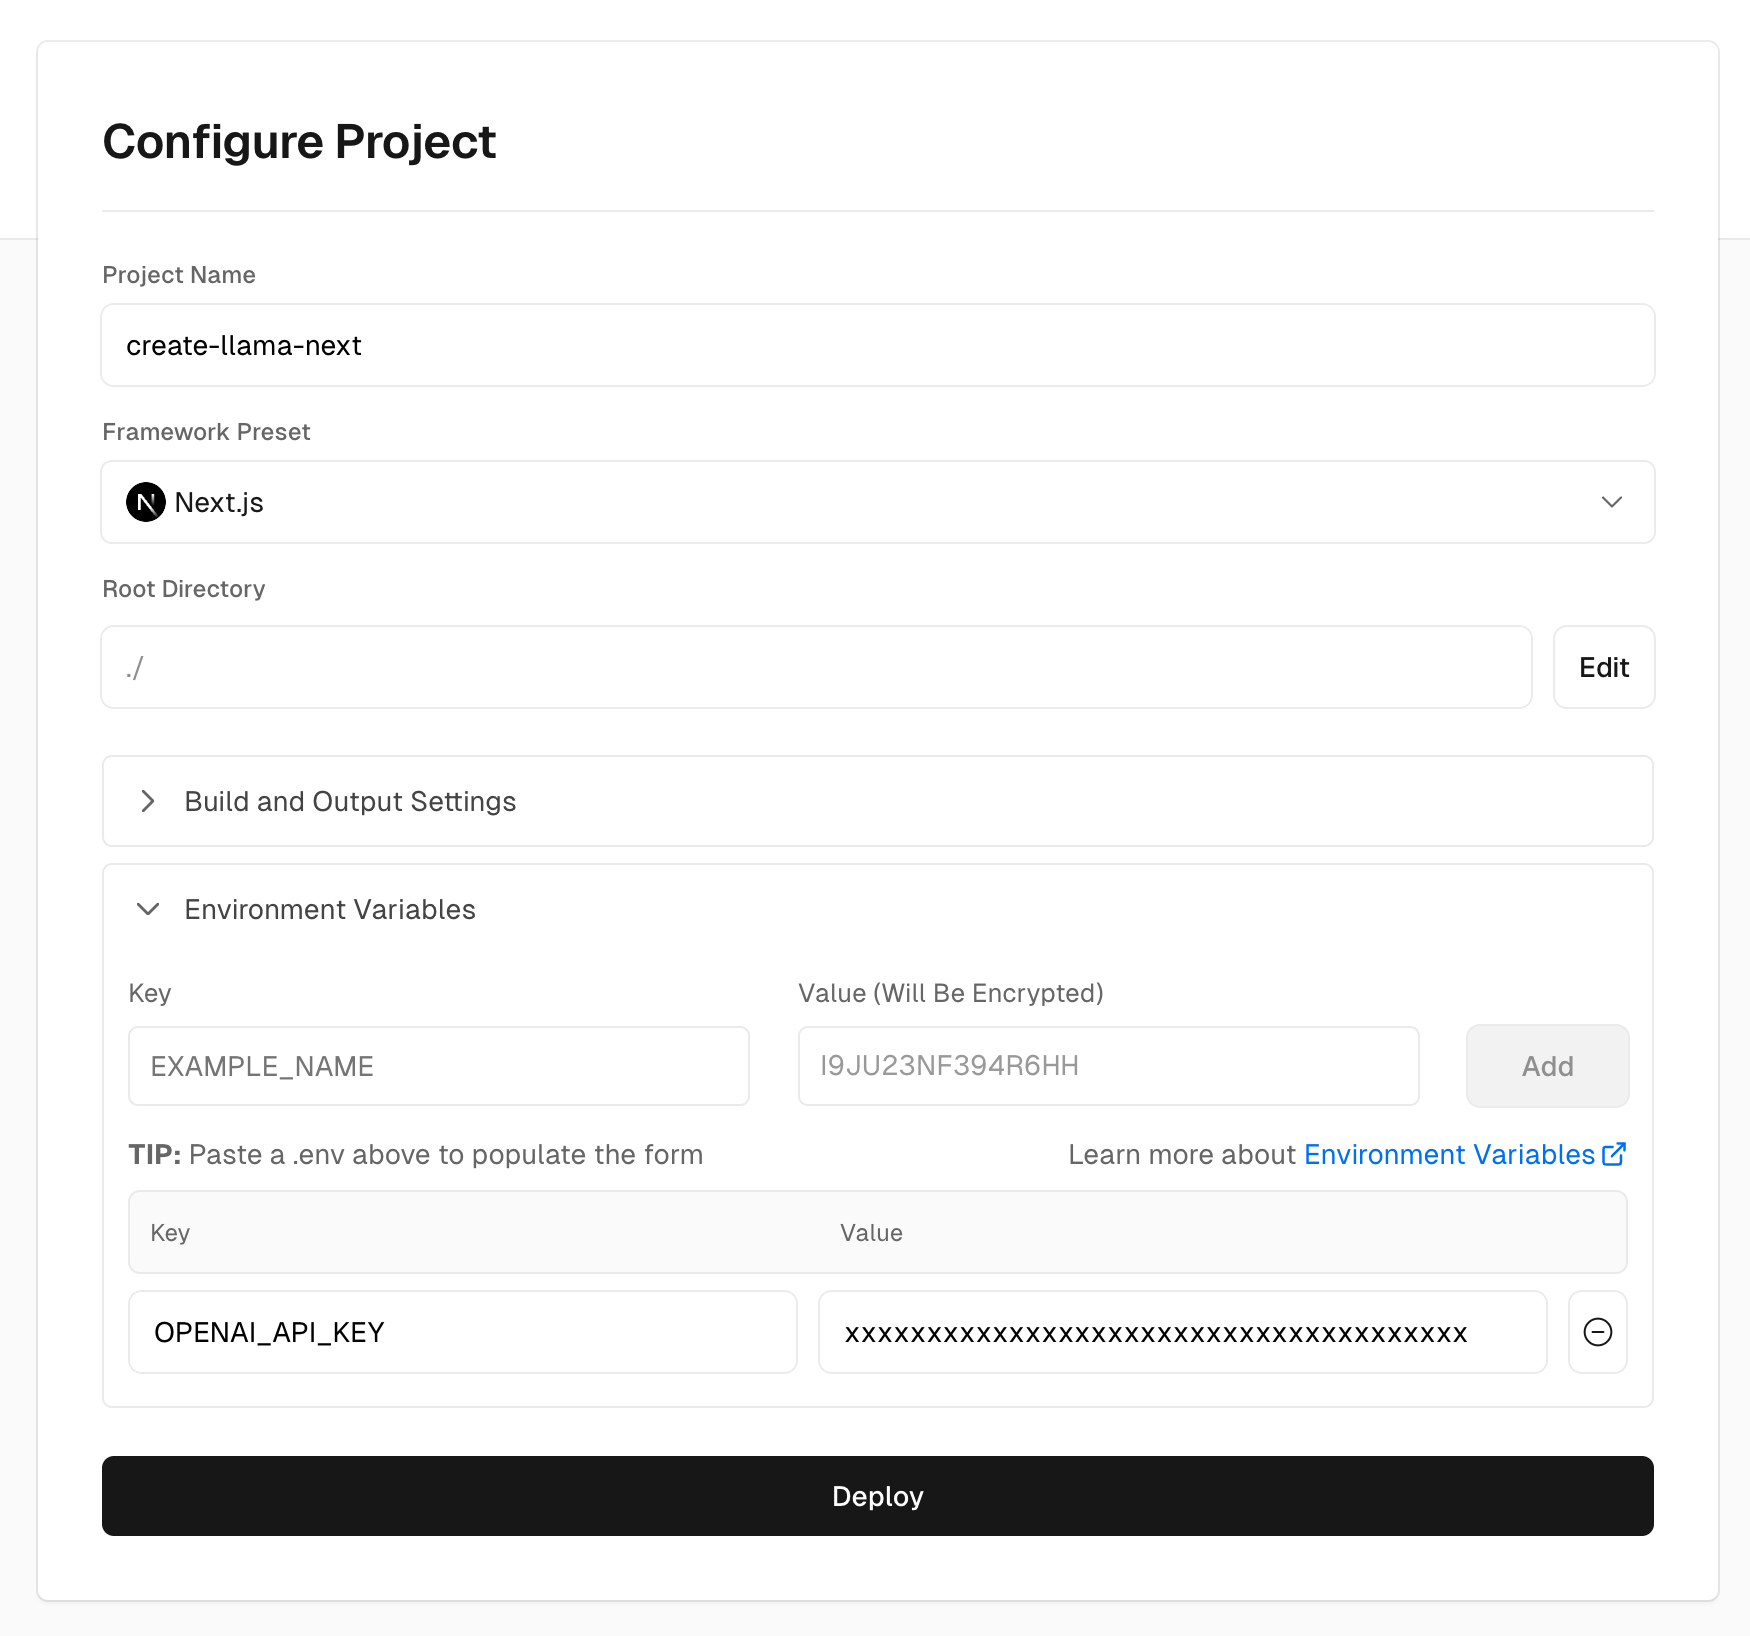
Step 4: configure your project
Because this is a Next.js app and this is Vercel, there’s very little you need to do! The only thing you need to remember is to click “environment variables” and create a variable called OPENAI_API_KEY with your key.
Step 5: Deploy!
That’s it! Deploying a Next.js app to Vercel is pretty easy.
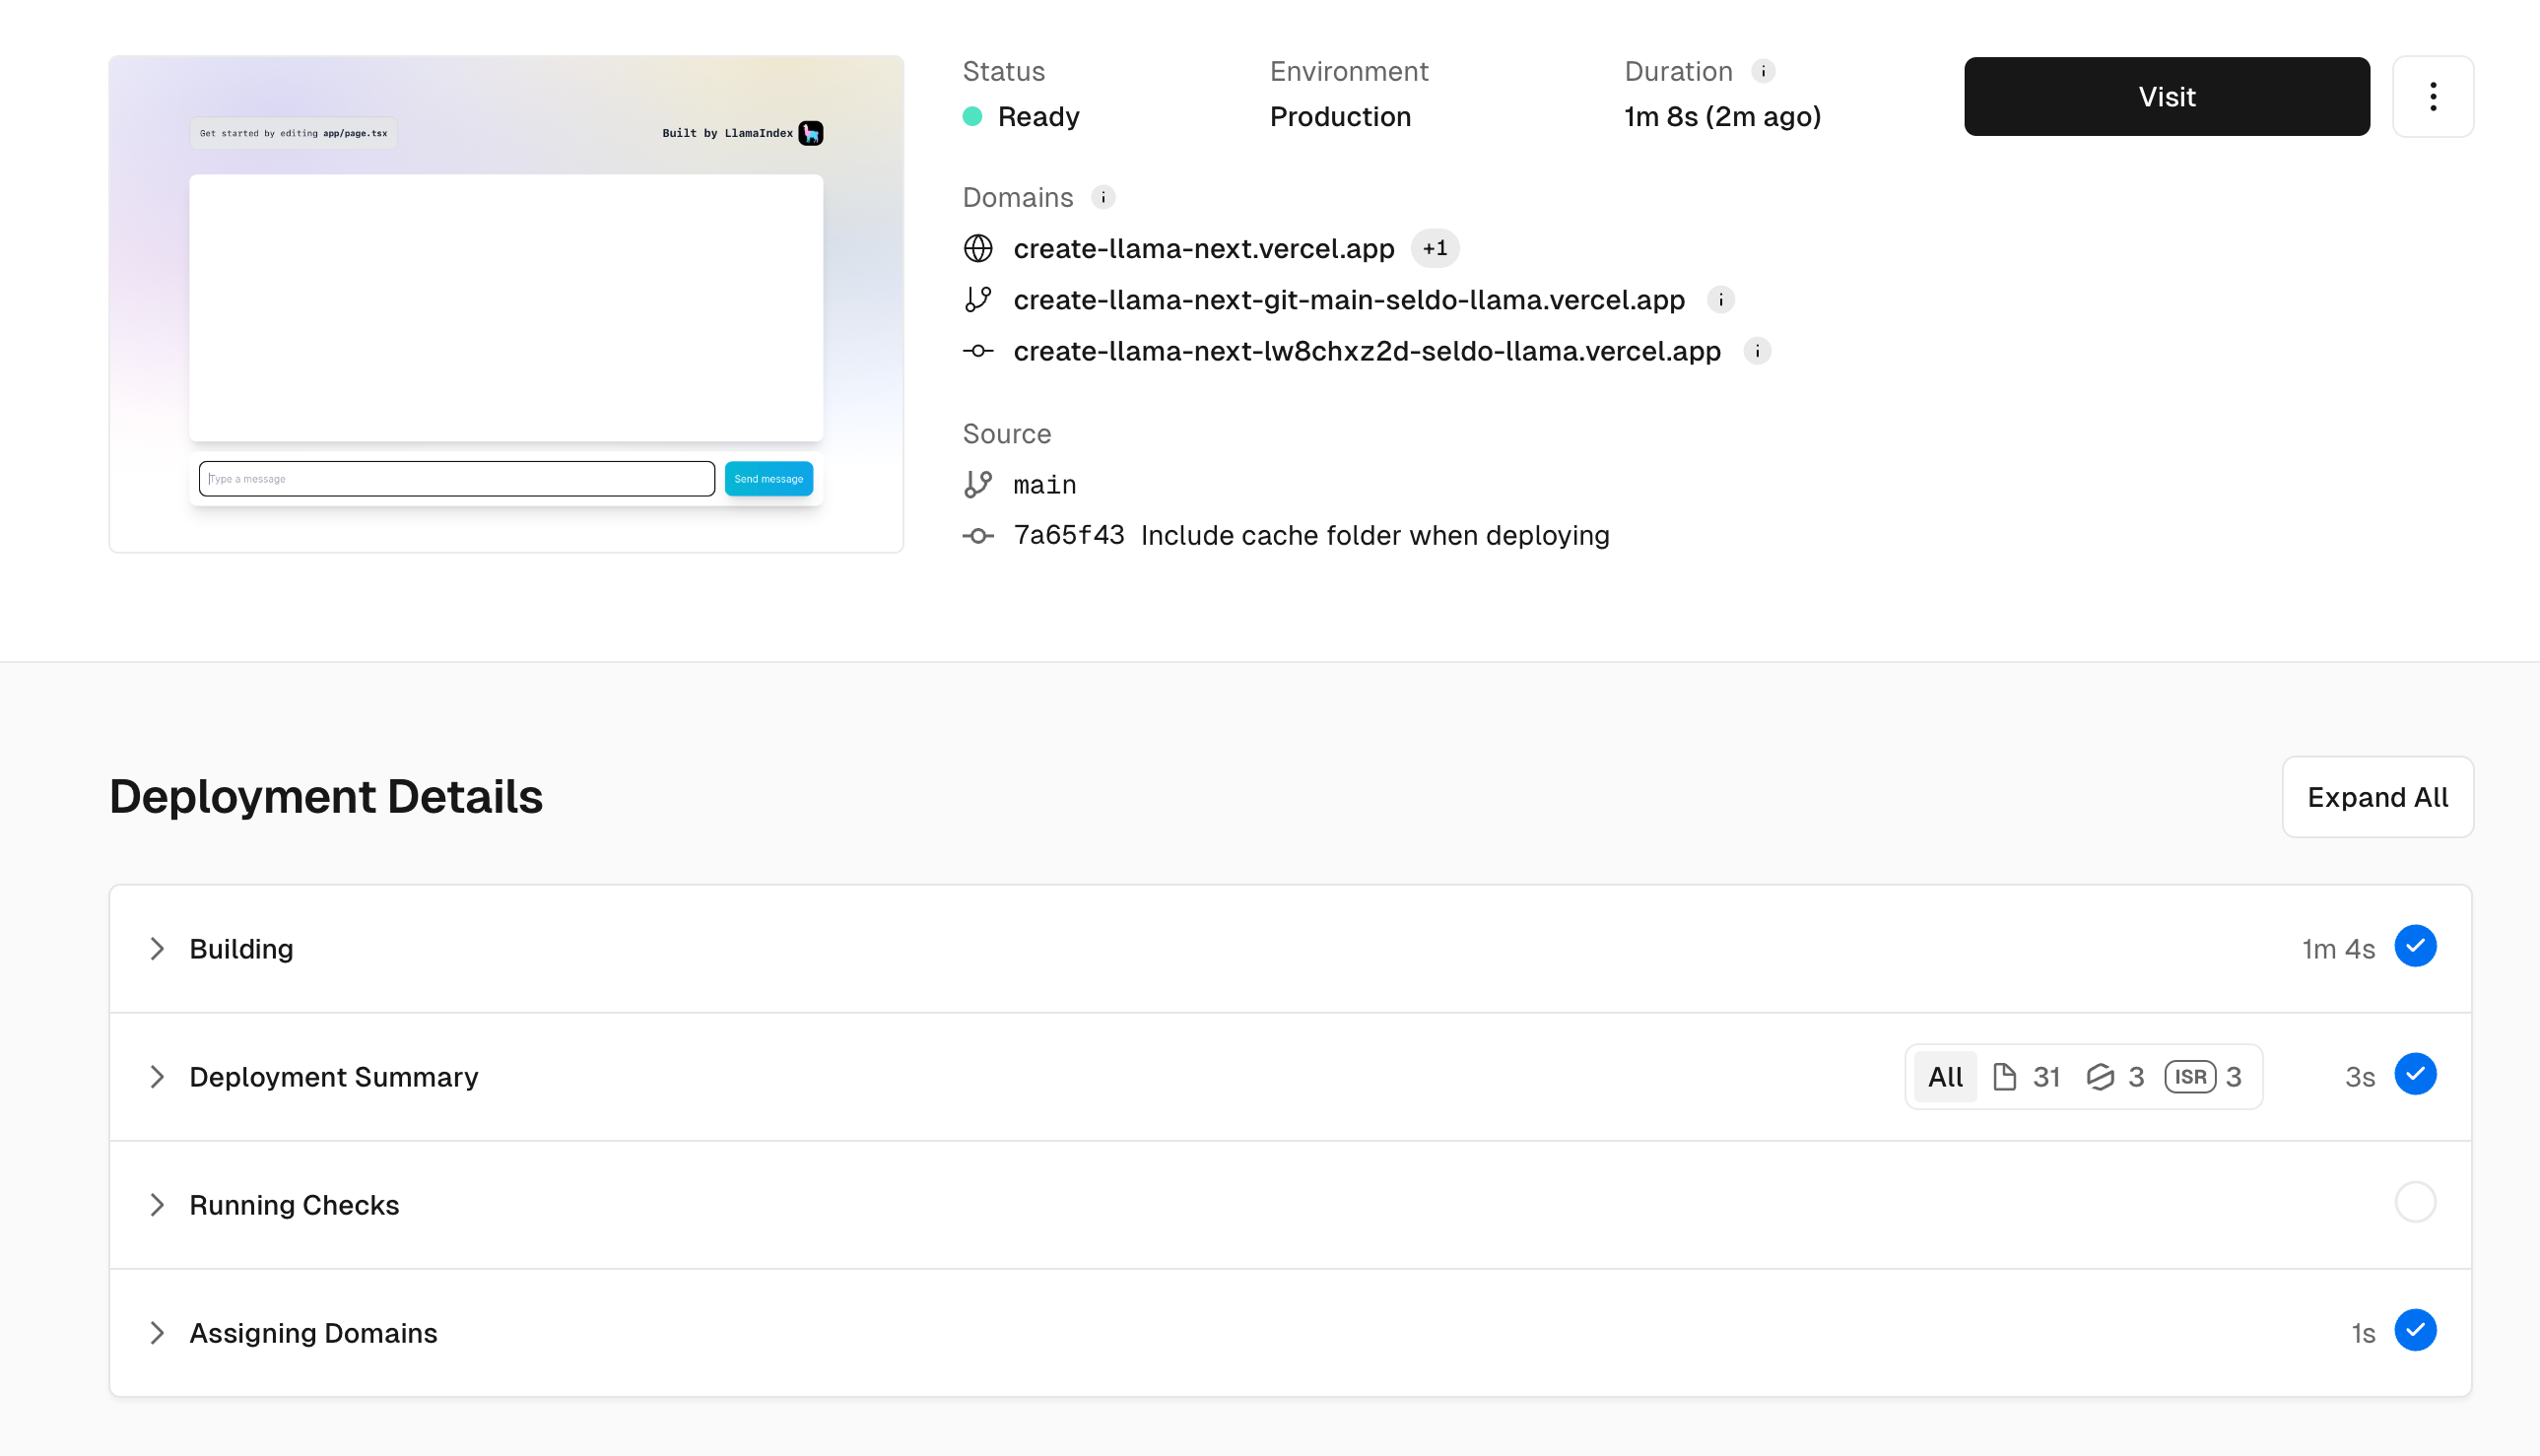
Your deployed app should look like this:
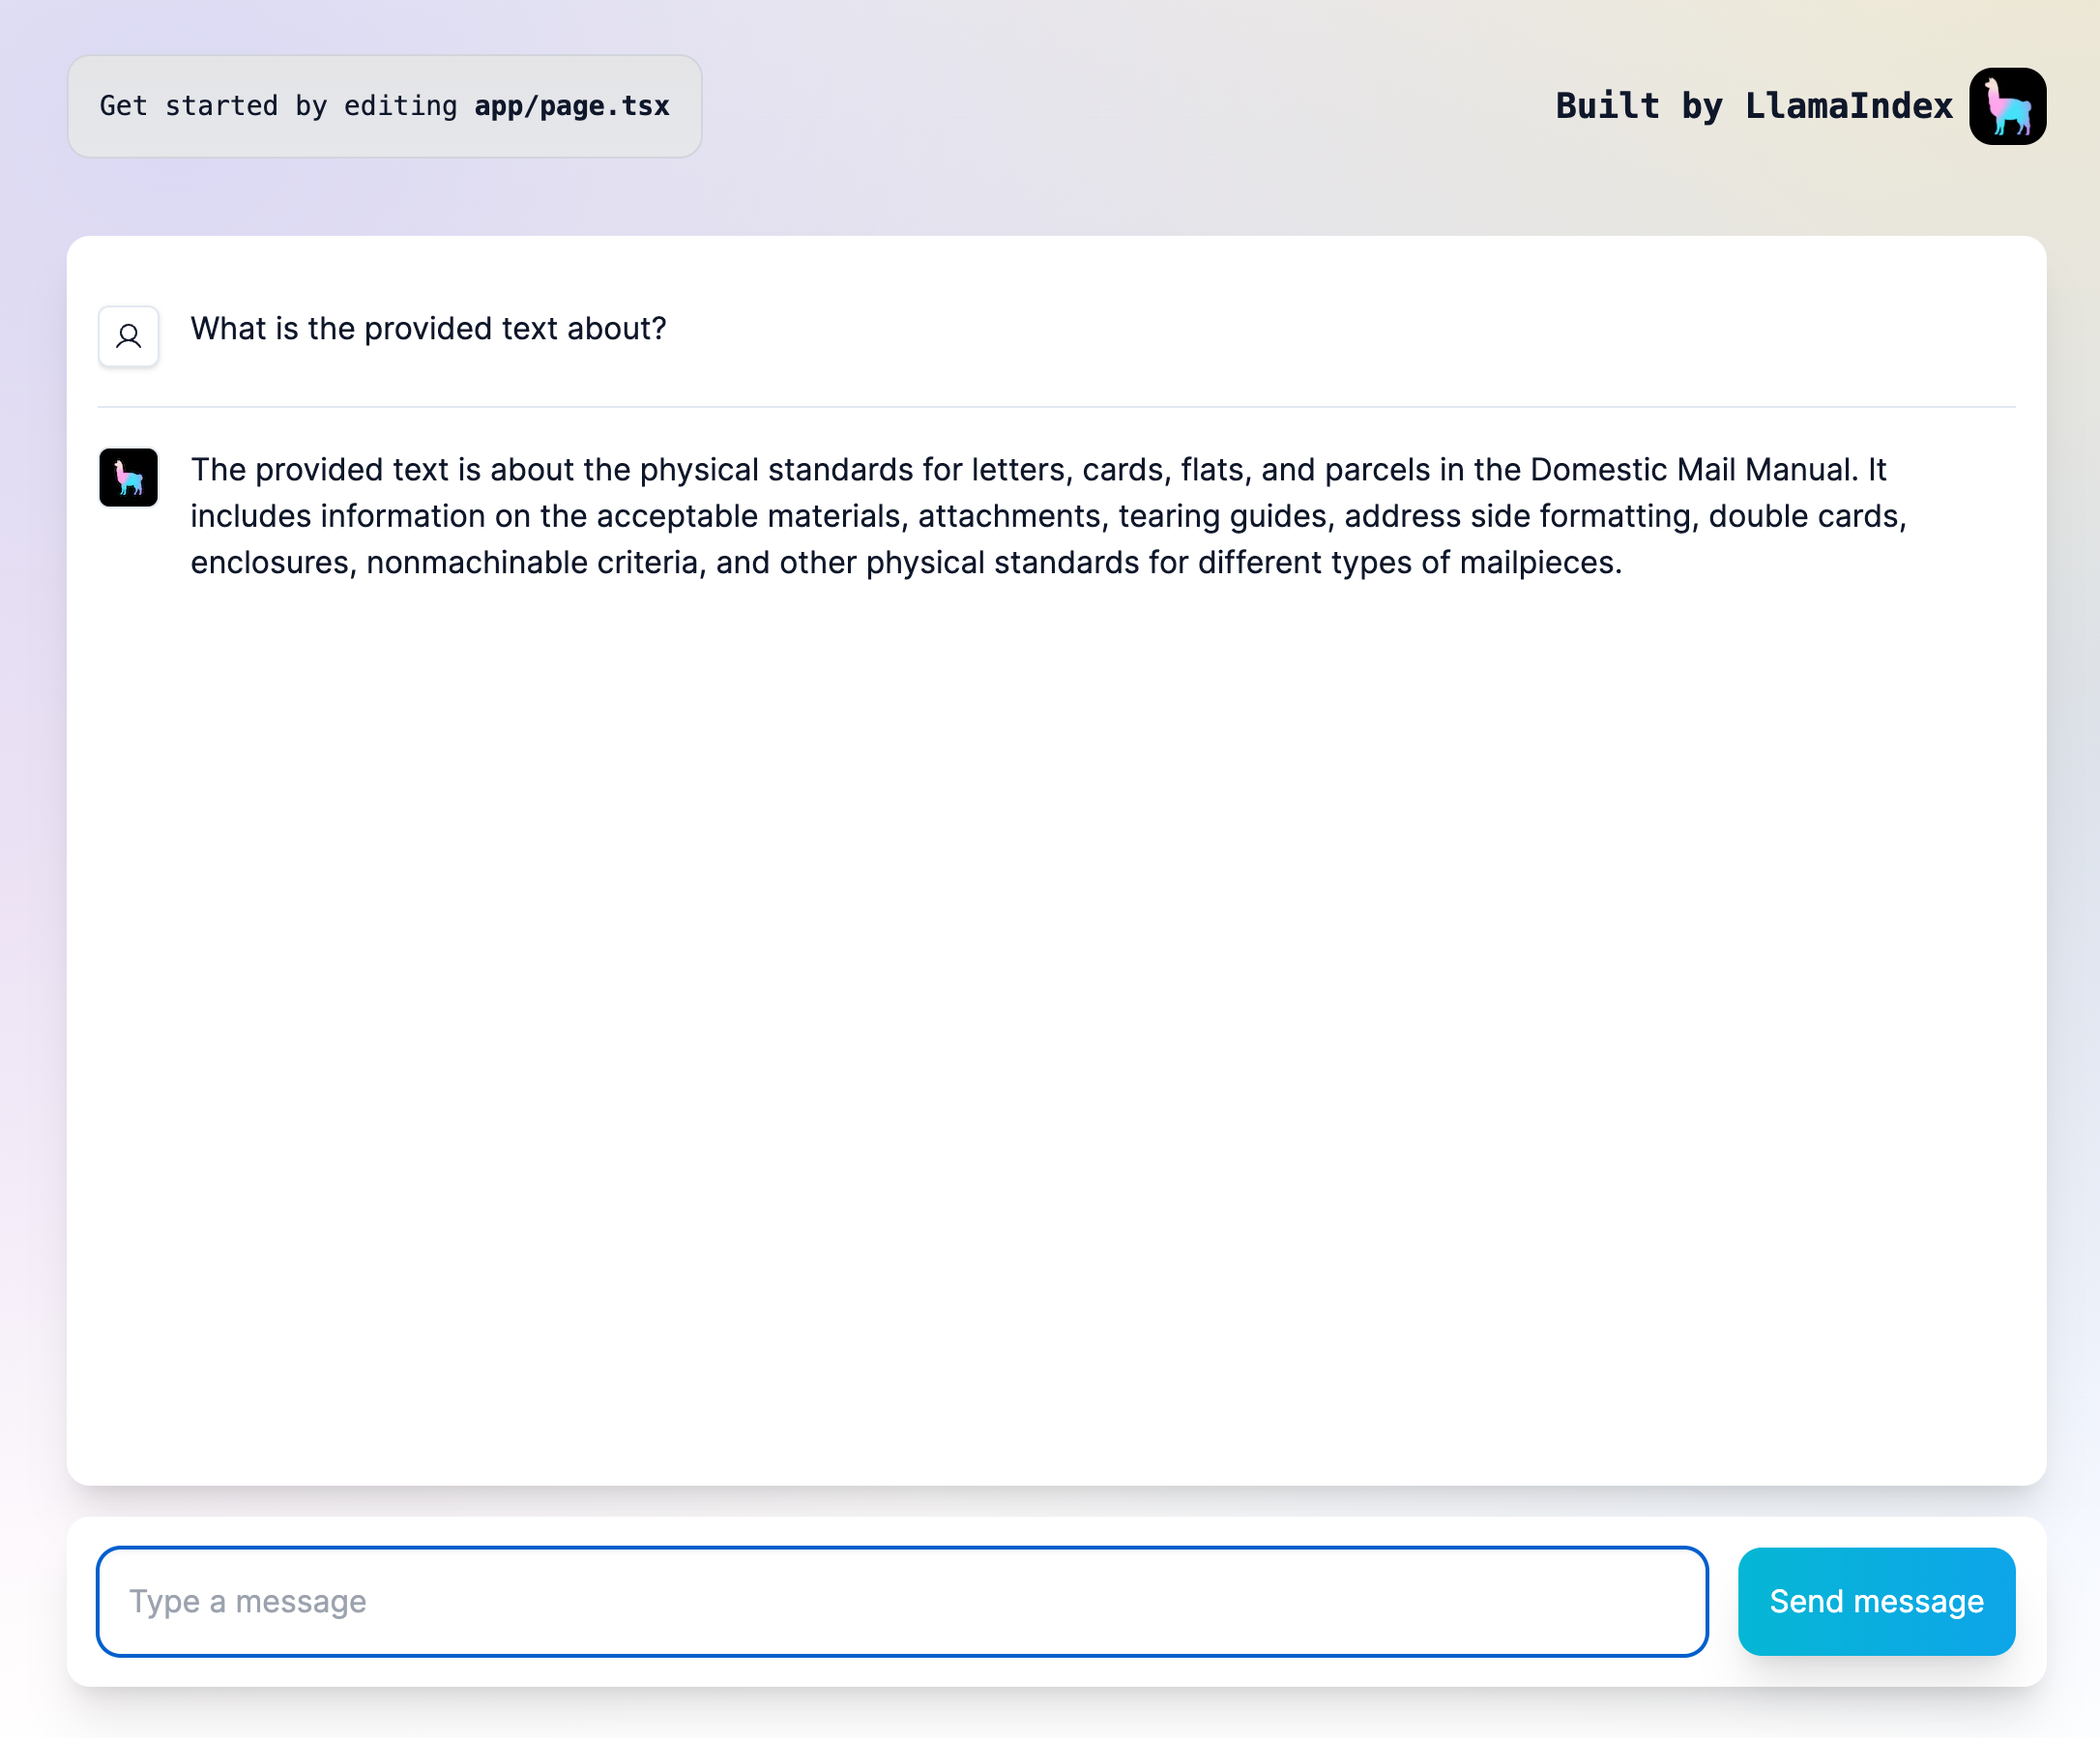
Congratulations, you’ve deployed a full-stack RAG application!
Express backend
If you chose to generate an Express backend with a Next.js frontend instead, let’s get you into production with those. We’ll be deploying both frontend and backend to Render, a fantastic service for both static sites and dynamic web applications.
There will be 3 big things to do here:
- Deploy the static frontend
- Deploy the backend, and give the frontend permission to call it
- Tell the frontend where the backend is located
We promise you’ll be production in no time.
Step 1: run create-llama
This is just like the same step in Next.js
Step 2: push the code to a new GitHub repo
Like Vercel, the easiest way to push a site to production is from a linked git repo. Your generated app already has a git repo initiated with frontend and backend folders, so you can go ahead and push them both to a single GitHub repository just as in the Next.js backend.
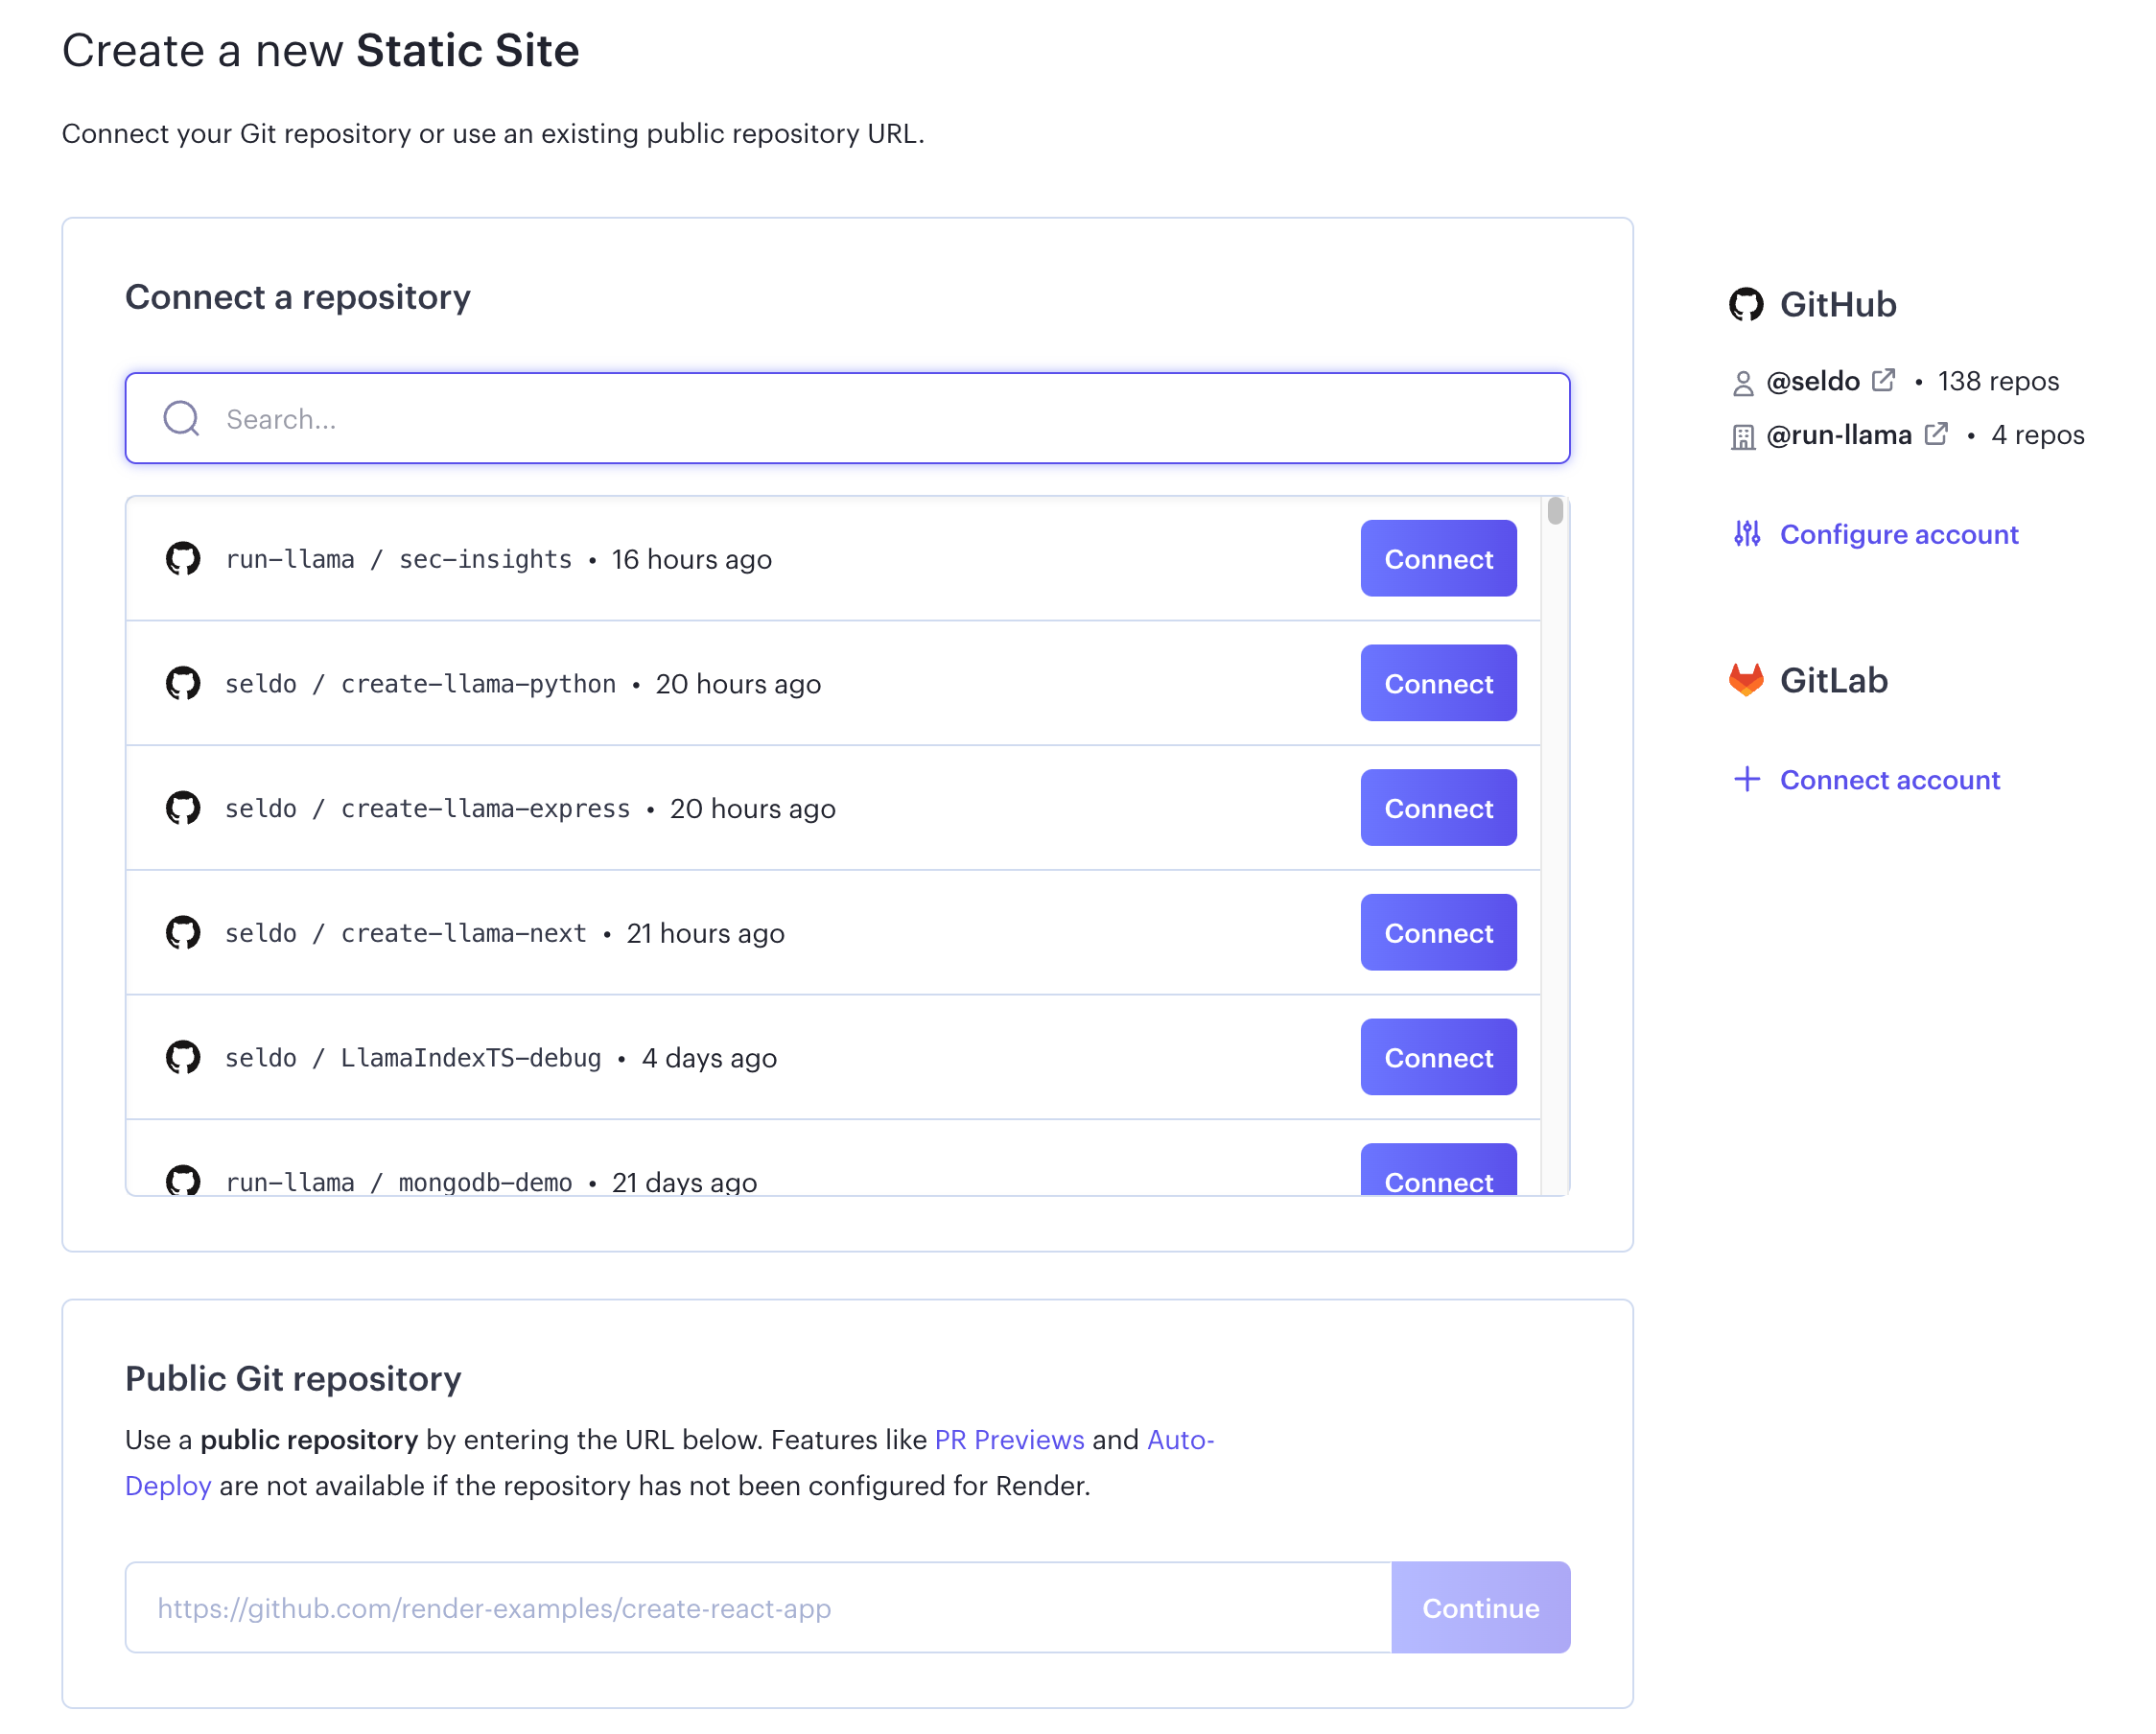
Step 3: Start a new static site
We’ll be deploying your frontend first as a static site. After authorizing, select the repository where you pushed your frontend and backend; we’ll specify that we’re deploying the frontend in the next step.
Step 4: configure your static site
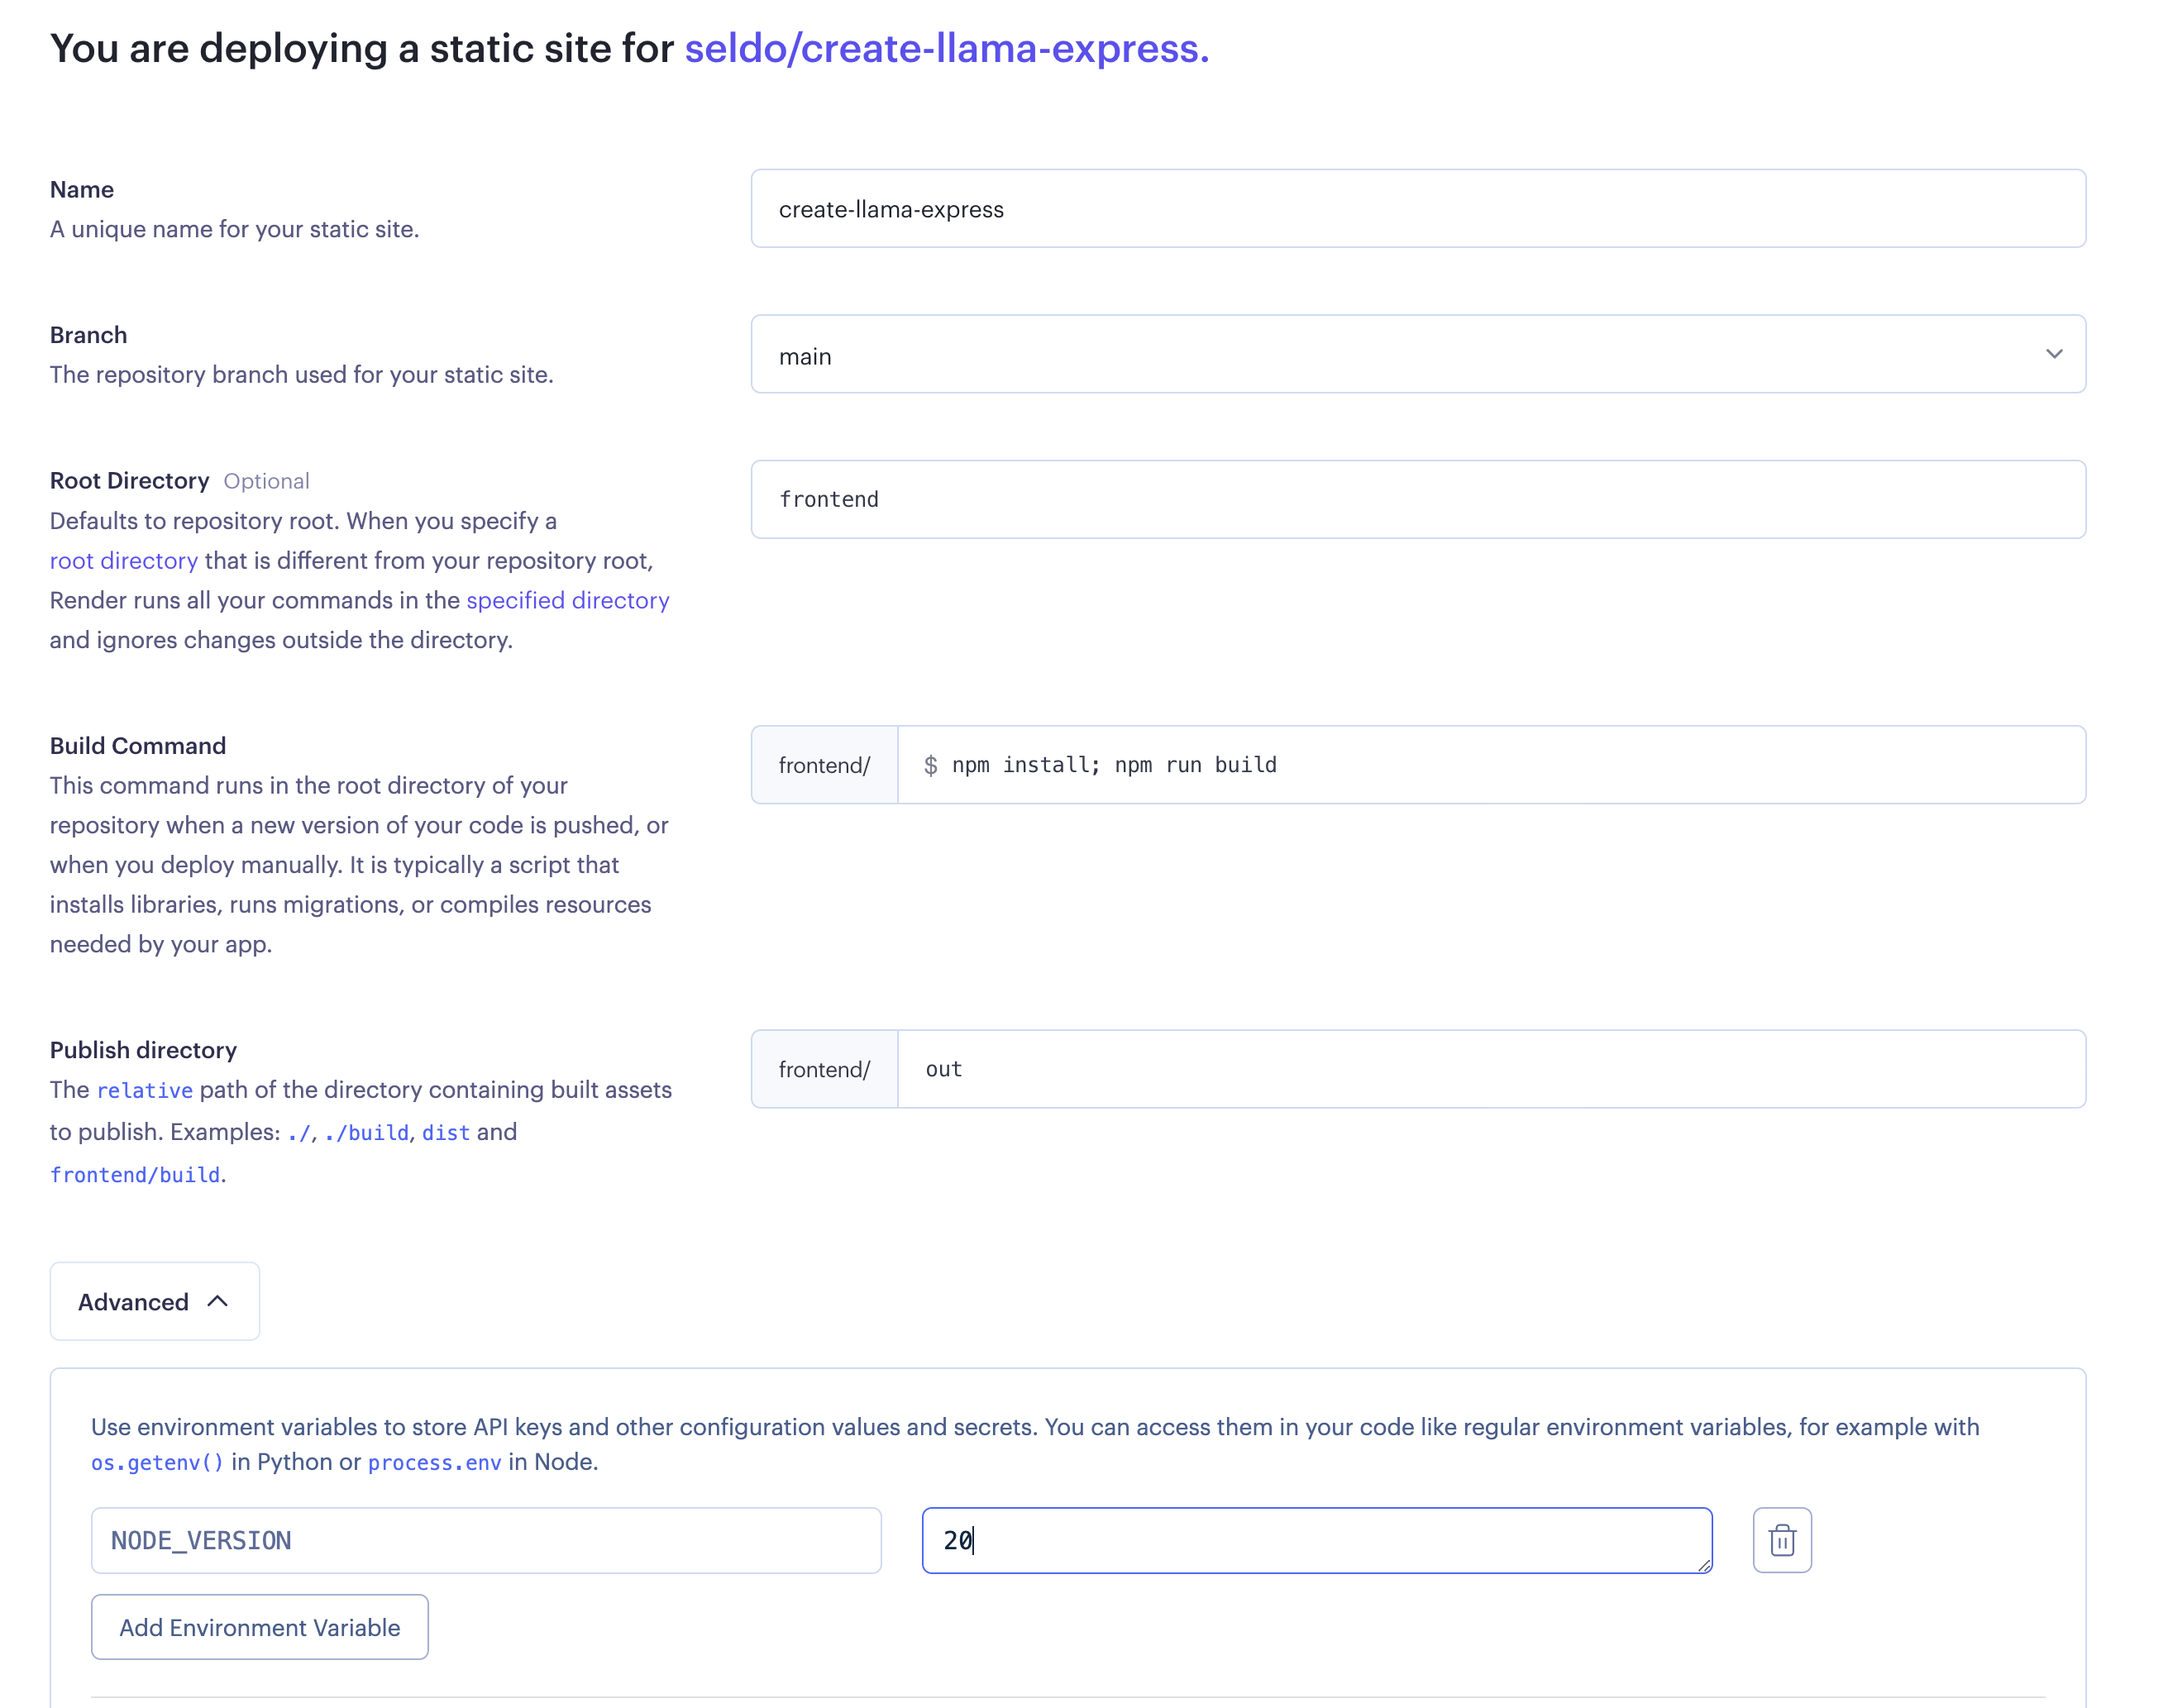
There are several changes you need to make to the default configuration to successfully publish your static frontend:
- Name your site something memorable, it will become the URL of your site once it’s deployed
- Set your root directory to
frontend - Set your build command to
npm install; npm run build - Set your publish directory to
out - Finally, click “Advanced” and set an environment variable called
NODE_VERSIONto20. The default on Render is a much older version of Node so don’t skip this step!
Step 5: deploy your static frontend
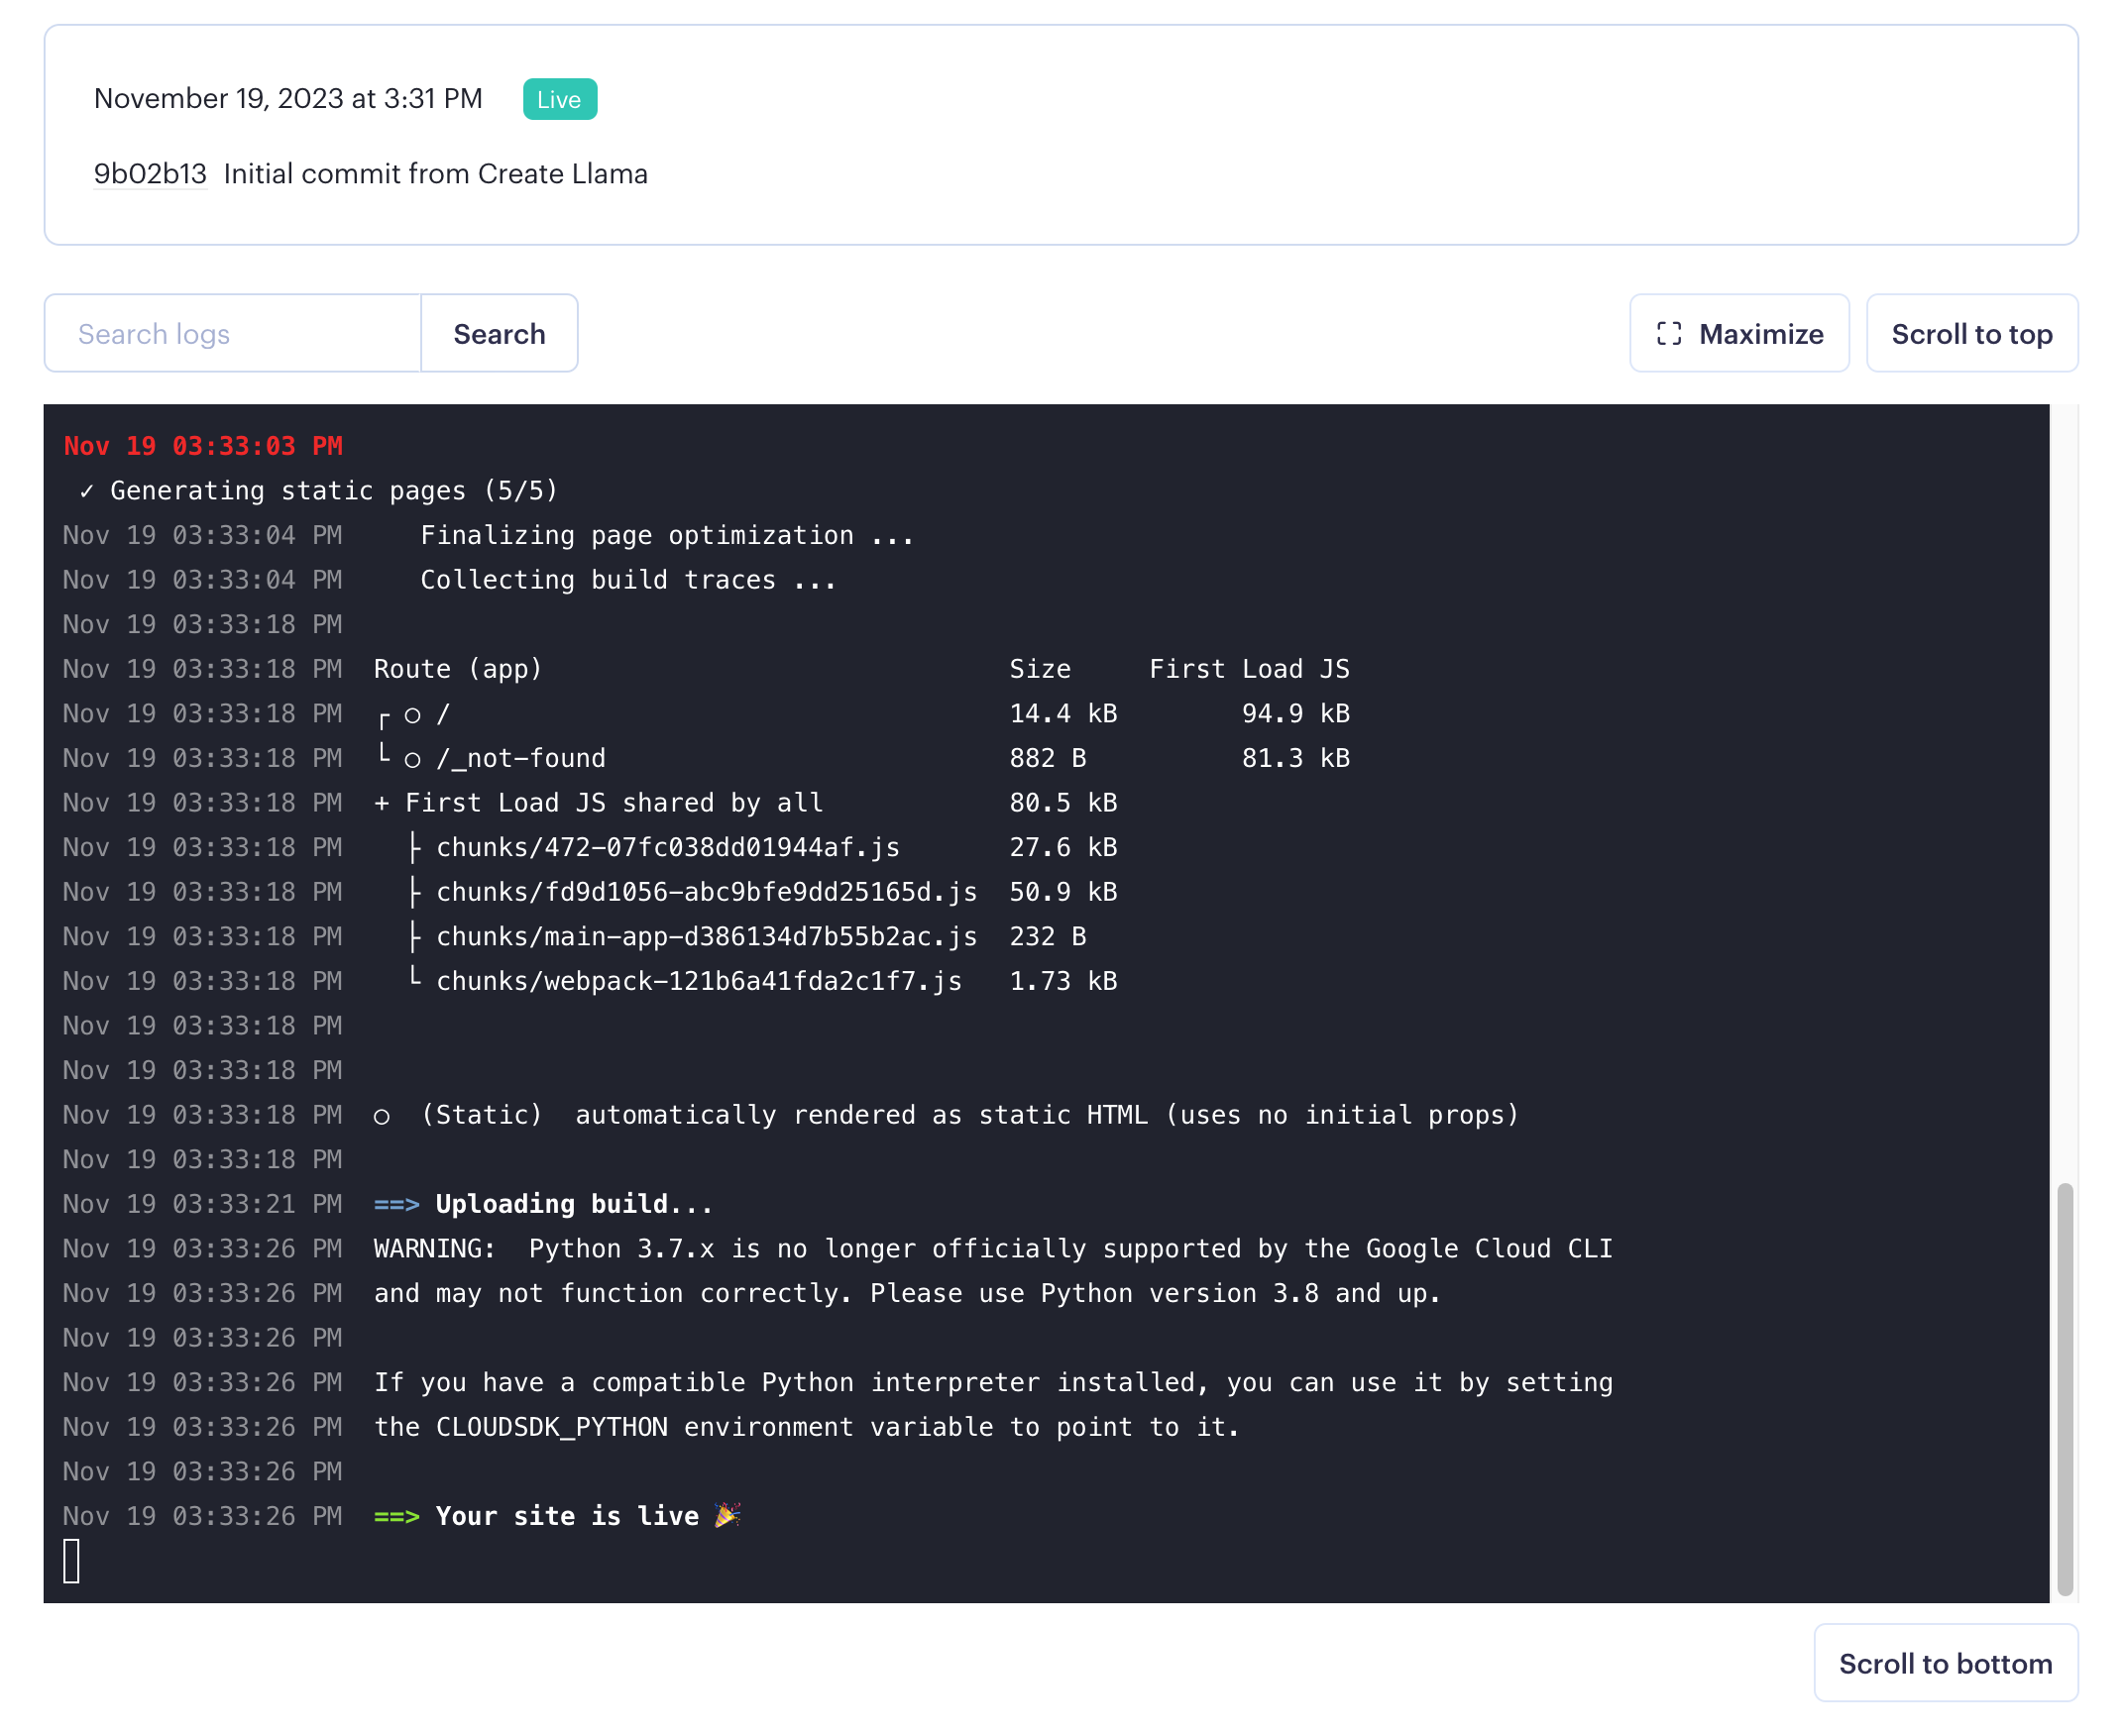
Click the Deploy button and watch your site build! You should now have a site live at a URL something like frontend-name-you-picked.onrender.com .