
Introduction
The C3 Voice Assistant is my latest project aimed at making Large Language Model (LLM) and Retrieval-Augmented Generation (RAG) applications more accessible. This voice-activated assistant caters to a broad audience, including those facing typing challenges or accessibility issues.
Features
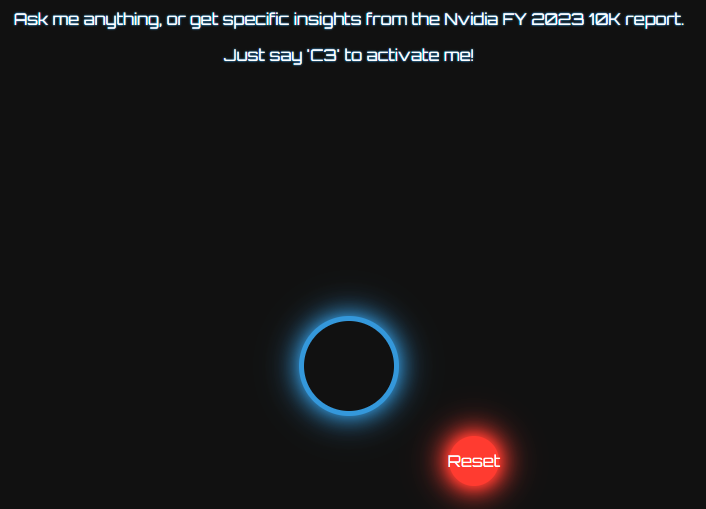
- Voice Activation: Initiated by saying “C3.” Alternatively, users can click the blue ring to activate the listening mode of the app. The wake word “C3” is configurable and you can choose any other word.
- Universal Accessibility: Ideal for users preferring voice commands or facing typing challenges.
- LLM Integration: Capable of general queries and document-specific inquiries (e.g., Nvidia’s FY 2023 10K report).
- User-Friendly Interface: The interface of the AI voice assistant is designed for simplicity and ease of use, focusing on voice chat interactions. It features a minimalistic and user-friendly React.js layout. Additionally, there is a convenient sidebar that displays the entire chat history in text format, allowing users to review and reflect on their interactions with the AI.
The Tech Stack
The app is built on a robust and flexible tech stack that ensures a smooth, reliable, and efficient user experience. Here’s an overview:
- Frontend: The user interface is a custom application developed using React.js. It’s designed to be minimalistic yet highly functional, prioritizing ease of use and accessibility.
- Backend: The server-side operations are powered by Python Flask. I’ve utilized the innovative ‘create-llama’ feature from LlamaIndex, which significantly streamlines the development process.
- Hosting: For a seamless performance, the frontend of the C3 Voice Assistant is hosted on Vercel. The backend, on the other hand, is deployed on Render, ensuring efficient management and operation of server-side tasks.
Building the Frontend
The frontend, built with React.js, focuses on user interaction and accessibility. The App.js script incorporates features like wake word recognition, speech-to-text conversion, state management, and dynamic UI elements like speech bubbles and spinners.
1. Component and State Initialization
This section sets up the React component and initializes various states, such as appState to track the current state of the app (idle, listening, speaking), and transcript to store the text transcribed from user speech.
import React, { useState, useRef, useEffect } from "react";
import "./App.css";

const App = () => {
  const [appState, setAppState] = useState("idle");
  const [transcript, setTranscript] = useState("");
  // Additional state and ref declarations...
};
2. Speech Recognition Setup
In this useEffect hook, two speech recognition instances are initialized: one for detecting the wake word “C3” and another for the main speech recognition. This setup ensures that the app starts listening for commands when “C3” is mentioned.
You can easily swap “C3” with any other wake word of your choice.
  useEffect(() => {
    // Wake word listener setup
    const WakeWordSpeechRecognition =
      window.SpeechRecognition || window.webkitSpeechRecognition;
    if (WakeWordSpeechRecognition && !wakeWordRecognitionRef.current) {
      wakeWordRecognitionRef.current = new WakeWordSpeechRecognition();
      wakeWordRecognitionRef.current.continuous = true;
      wakeWordRecognitionRef.current.interimResults = false;

      wakeWordRecognitionRef.current.onresult = (event) => {
        const transcript = event.results[event.results.length - 1][0].transcript
          .trim()
          .toLowerCase();
        if (transcript.includes("c3")) {
          toggleRecording(); // Start the main speech recognition process
        }
      };

      wakeWordRecognitionRef.current.start();
    }

    // Main speech recognition setup
    const SpeechRecognition =
      window.SpeechRecognition || window.webkitSpeechRecognition;
    if (SpeechRecognition && !recognitionRef.current) {
      recognitionRef.current = new SpeechRecognition();
      recognitionRef.current.continuous = false;
      recognitionRef.current.interimResults = false;

      recognitionRef.current.onresult = (event) => {
        const lastResultIndex = event.results.length - 1;
        const transcriptResult = event.results[lastResultIndex][0].transcript;
        setTranscript(transcriptResult);
        setAppState("playing");
        setShowSpeechBubble(true);
        setTimeout(() => setShowSpeechBubble(false), speechBubbleTimeout);
        fetchResponseFromLLM(transcriptResult);
      };

      recognitionRef.current.onend = () => {
        setShowSpinner(true);
      };
    }
  }, []);
3. Handling User Speech and Response
toggleRecording controls the speech recognition process, while fetchResponseFromLLM sends the user's speech to the LLM backend and handles the response. This response is then spoken out via speech synthesis and also used to update the chat history displayed on the UI.
 const toggleRecording = () => {
    try {
      if (appState === "idle") {
        recognitionRef.current.start();
        setAppState("listening");
      } else if (appState === "listening") {
        recognitionRef.current.stop();
      }
    } catch (error) {
    }
  };
const fetchResponseFromLLM = async (text) => {
try {
const response = await fetch(
`https://c3-python-nostream.onrender.com/api/chat`,
{
method: "POST",
headers: { "Content-Type": "application/json" },
body: JSON.stringify({
messages: [
{
role: "user",
content:
"You are an AI voice assistant called C3. You can provide any general information as well as answer basic questions about the Nvidia 10k report for year ended Jan 2023" +
text,
},
],
}),
}
);
const data = await response.json();
setChatHistory((prevHistory) => [
...prevHistory,
{ query: text, response: data.result.content },
]);
speak(data.result.content);
} catch (error) {
console.error("Error communicating with LLM:", error);
}
};4. Speech Synthesis
The speak function takes the text response from the LLM and uses the SpeechSynthesis API to read it aloud, providing an interactive experience for the user.
  const speak = (text) => {
    if (synthRef.current && text) {
      const utterance = new SpeechSynthesisUtterance(text);

      const voices = window.speechSynthesis.getVoices();
      if (voices.length > 0) {
        utterance.voice = voices[3]; // You can change this to select different voices
      }

      utterance.onstart = () => {
        console.log("TTS starts speaking");
        setShowSpinner(false);
      };

      utterance.onend = () => {
        setAppState("idle");
        if (wakeWordRecognitionRef.current) {
          wakeWordRecognitionRef.current.start(); // Restart wake word listener after speaking
        }
      };
      synthRef.current.speak(utterance);
    }
5. UI Rendering
The return statement of the App function contains the JSX code for rendering the app's UI. This includes buttons for starting/stopping the voice interaction, a display area for the transcript, and a chat sidebar showing the history of interactions.
By combining voice recognition, LLM integration, and speech synthesis, this frontend component provides a comprehensive and accessible interface for interacting with the C3 Voice Assistant.
Backend Server Setup
- Initialize Create-Llama: Run
npx create-llama@latestin your terminal. - Follow the prompts to set up a Python FastAPI backend, which we can be integrated with our frontend.
- Use
poetry installandpoetry shellto prepare the environment. - Create a
.envfile withOPENAI_API_KEY=<openai_api_key>. - Generate Embeddings (optional): If a
./datadirectory exists, runpython app/engine/generate.py. - Execute
python main.pyto start the server. - Test the API: Use
curl --location 'localhost:8000/api/chat' --header 'Content-Type: application/json' --data '{ "messages": [{ "role": "user", "content": "Hello" }] }'to test. - Modify API behavior in
app/api/routers/chat.py. The server supports CORS for all origins, alterable with theENVIRONMENT=prodsetting.
Integration
Once the backend server is set up, integrating it with the frontend is straightforward. Simply update the fetchResponseFromLLM function in your frontend's App.js to call the backend server URL. This change ensures that when the frontend makes a request, it communicates with your newly configured backend, thus effectively integrating the two components.
Final Thoughts
Wrapping up, the C3 Voice Assistant isn’t just a tech showcase; it’s a stride towards democratizing AI. It’s about making powerful AI tools, like LLMs and RAG, accessible and user-friendly. This project is more than lines of code — it’s a push to break down tech barriers and empower everyone.
Your thoughts and feedback are invaluable — let’s make AI more accessible together!